Protect iOS AI requests with app keys and App Attest
A mobile app is an untrusted client: bundled secrets can be extracted. HyperProxy app keys avoid shipping the complete provider credential. Pair them with device proof and service limits to control who can use the gateway. An app key remains a credential and can be copied; split-key encryption alone does not prevent API abuse.
Updated · HyperProxy team
Provider key, app key, device proof
These serve different purposes. The provider key authorizes the upstream API. The app key authorizes this gateway service. Device proof adds verification of your configured application.
Gateway URL
App key with client half
Matching device proof
Stored server half
Access and usage checks
Provider auth injection
Receives provider credential
Processes the request
Returns its response
- 1Name and mint
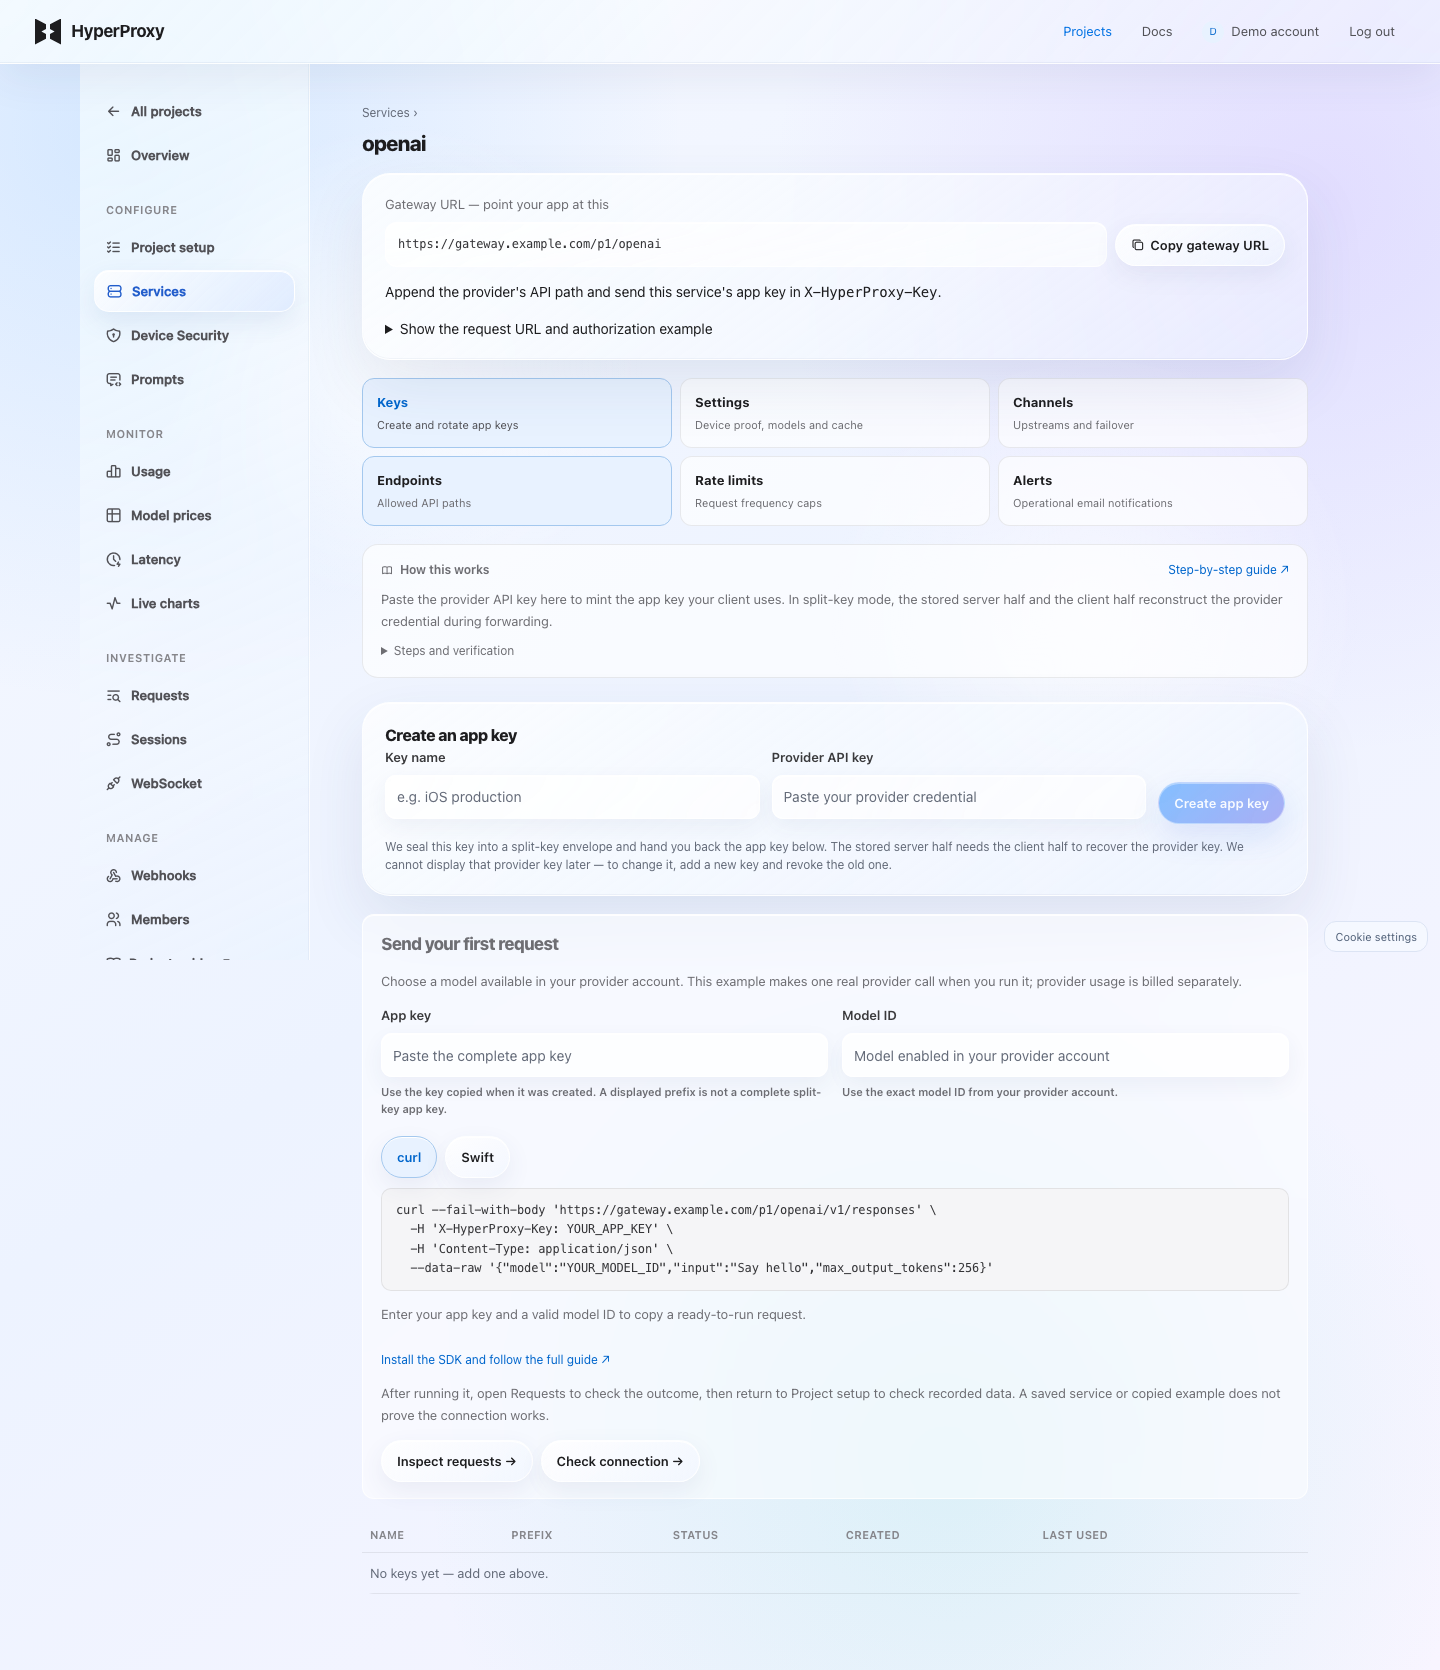
Open Keys, give the key a useful name such as ios-production and paste the real provider API key. Click Create app key. In split-key mode, the server half requires the client half to recover that credential.
- 2Copy the app key once
Copy the full displayed value before leaving the page. Send it as
X-HyperProxy-Keyto this service's Gateway URL. Do not embed the real provider key or a server ingest key in the client. - 3Add protection and verify
An app key can be extracted from a distributed app. Configure device proof, endpoint/model access and rate limits, then check a real request. Split-key storage does not prevent all misuse of a copied client key.
- 4Rotate with a rollout window
Choose Rotate on an existing key, paste the provider credential again and select how long the old app key remains usable. Mint the replacement, ship it, then retire or revoke the old key after your rollout. Immediately ends its access without a grace period.
Send your first request: for OpenAI, Claude or Gemini, enter an exact model ID available in your provider account and choose curl or Swift. A newly minted key fills the example; returning to Keys requires your saved complete app key. Copy the request and run it from your terminal or app, then use Inspect requests and Check connection. Copying an example makes no provider call; running it incurs provider usage. Device-protected services show the matching protection guide instead of a plain curl command. Custom upstreams require their own API path and payload.
Shared key override changes the boundary. An override is encrypted at rest and used for every request to the service. An active app key is still required, but its client secret half is no longer verified: a displayed prefix is sufficient. Keep this distinction in mind when using Settings → API key override.
DeviceCheck, App Attest, and App Check
Choose the proof required by each service. Security runs before provider forwarding and is separate from the app key.
- 1Configure the identity in Device Security
For App Attest, enter the Apple Team ID and app Bundle ID, choose the entitlement's environment, then Save identity. Live projects require Production; Development is available only in test projects. Changing identity or environment requires clients to enroll again.
- 2Complete the matching provider configuration
DeviceCheck needs the Apple-issued Key ID and .p8 private key; choose its production endpoint for TestFlight/App Store builds and Save DeviceCheck. The key is write-only; leave it blank to keep the existing one. Firebase needs the numeric project number and an explicit list of allowed Firebase App IDs; the client supplies a current App Check token. These are different fields from an Apple Team ID.
- 3Enable enforcement on the service
Open Services → your service → Settings and select the matching Device protection mode. The selection applies immediately. Saving the project identity alone does not turn on protection, and enabling it affects clients that do not send the proof.
- 4Match the SDK and test
Configure the same protection mode in your app. Test on a physical device and inspect Requests. For simulator testing, use a test project and a one-hour bypass in the Xcode scheme; live projects never accept it. Anyone with that bypass can skip Apple checks until it expires or is revoked.
Generate a fresh Apple proof per request for lightweight device validation and replay protection.
Attest once, then use a short-lived device token. No Apple round-trip is needed on every request.
Sign the method, URL, body, and routing controls in Secure Enclave. A monotonic counter rejects replay.
Require App Check tokens for Android, Apple, or web clients when Firebase owns application attestation.
let appAttest = HyperProxyAppAttest(
  projectID: "<project-public-id>",
  gatewayURL: gatewayURL
)
let protectedOpenAI = HyperProxy.openAI(
  gatewayURL: gatewayURL,
  appKey: appKey,
  security: appAttest.security(mode: .deviceToken)
)
Set the same Apple Team ID and bundle ID in the project and signed app, then select the matching service protection mode. Validate on a physical device. Live projects require production App Attest; development signatures use a test project. For the simulator, mint an expiring test-project bypass and keep it in the Xcode scheme, never in source. Assertion mode is HTTP-only; use DeviceCheck or device-token mode for WebSockets. Device verification guide.
Limits, allowlists, and rotation
Endpoint allowlistsRestrict each service to explicit upstream paths or allow every endpoint.
Granular limitsApply per-key, per-IP, or per-device rules with clear retry guidance.
Named app keysSegment, rotate with a grace period, or revoke keys per app version. Rotation re-seals the provider key you paste again; the old key keeps working until the window you choose ends.
Model policyAllowlist the models a service may call, or pin every request to one model so a leaked key cannot reach a pricier one. Refusals answer 403 model_not_allowed before anything is counted; a pin is reported in X-HyperProxy-Served-Model.
Response cacheOpt in per service: response bodies are stored in Redis until the TTL expires (up to seven days, including after project deletion). Keep the cache off for responses you do not want retained. Identical non-streaming JSON requests within the TTL are answered from the gateway (X-HyperProxy-Cache: HIT) with no provider call or cost. Streams, errors, requests over 64 KiB, and responses over 256 KiB are never cached; send Cache-Control: no-cache to bypass.
Failure alertsReceive an email after a configured run of upstream failures.
Verify it works
Test a valid request from a supported physical iOS device, then verify that a request without the required assertion is rejected before forwarding. Confirm the provider receives no call for the rejected attempt. Check your production Apple team and bundle identifiers before enforcing the policy.
Troubleshooting
Simulator cannot attest
Use a supported physical device for App Attest. Check support before registering the device; a simulator run does not validate production attestation.
Valid app is rejected
Match the service’s Apple Team ID, bundle ID and App Attest environment to the signed app. Inspect the request error code and the SDK registration flow.
Abuse continues with a valid device
Device proof establishes an app/device signal, not a trustworthy user or a guarantee against automation. Combine authentication, per-client limits, budgets, monitoring and key rotation.
Next steps
1,000 requests per month shared across projects. No card required. Provider charges are separate.